-
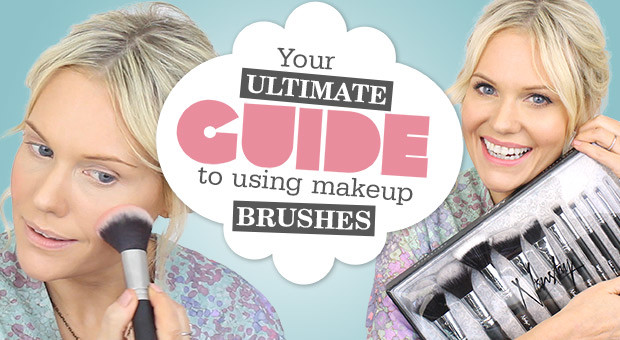
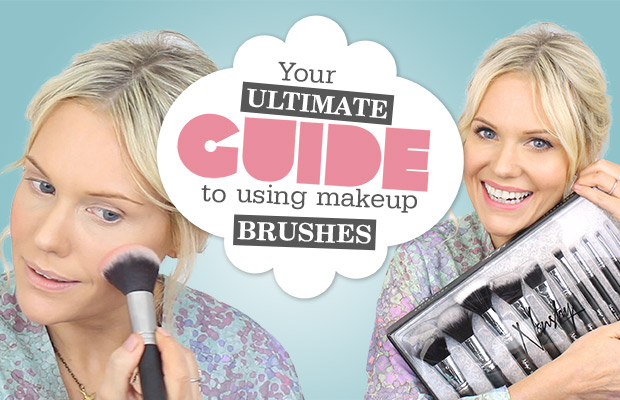
Your Ultimate Guide To Using Makeup Brushes!

Hi Friends!
I’ll let you in on a little secret…most Makeup Artist’s will tell you the ONE thing they can’t be without in their kits is their makeup brushes!
Whether you’ve used makeup brushes before OR you’re a complete novice, my video guide promises to teach you easy to follow techniques that’s going to take your makeup to the next level!
Now YOU can become the master of your own make-up looks…NO make-up artist required!
Get ready to learn everything there is to know about taking your makeup to perfection with makeup brushes in my video below!
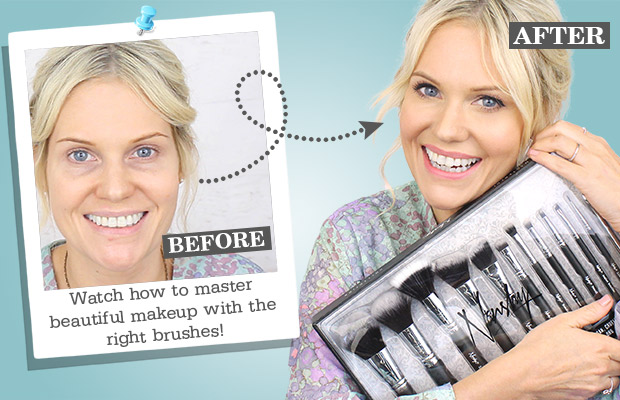


Testimonials from my FaceBook community:


Recap of my video

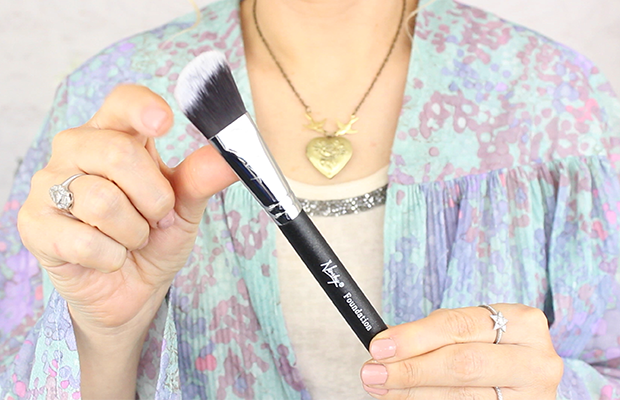
Why You Need a Foundation Brush
When you want your liquid or cream formulated foundation to look like it’s your skin – only MUCH better – then you need a Foundation brush and a Stippling brush (more on the stippling brush later!).
These two brushes work in tandem to create the best looking foundation of your life! The Foundation brush works to apply the foundation evenly across the face while the Stippling brush is used afterwards to buff and blend the foundation into the contours of your face.
How to use a Foundation Brush like a pro
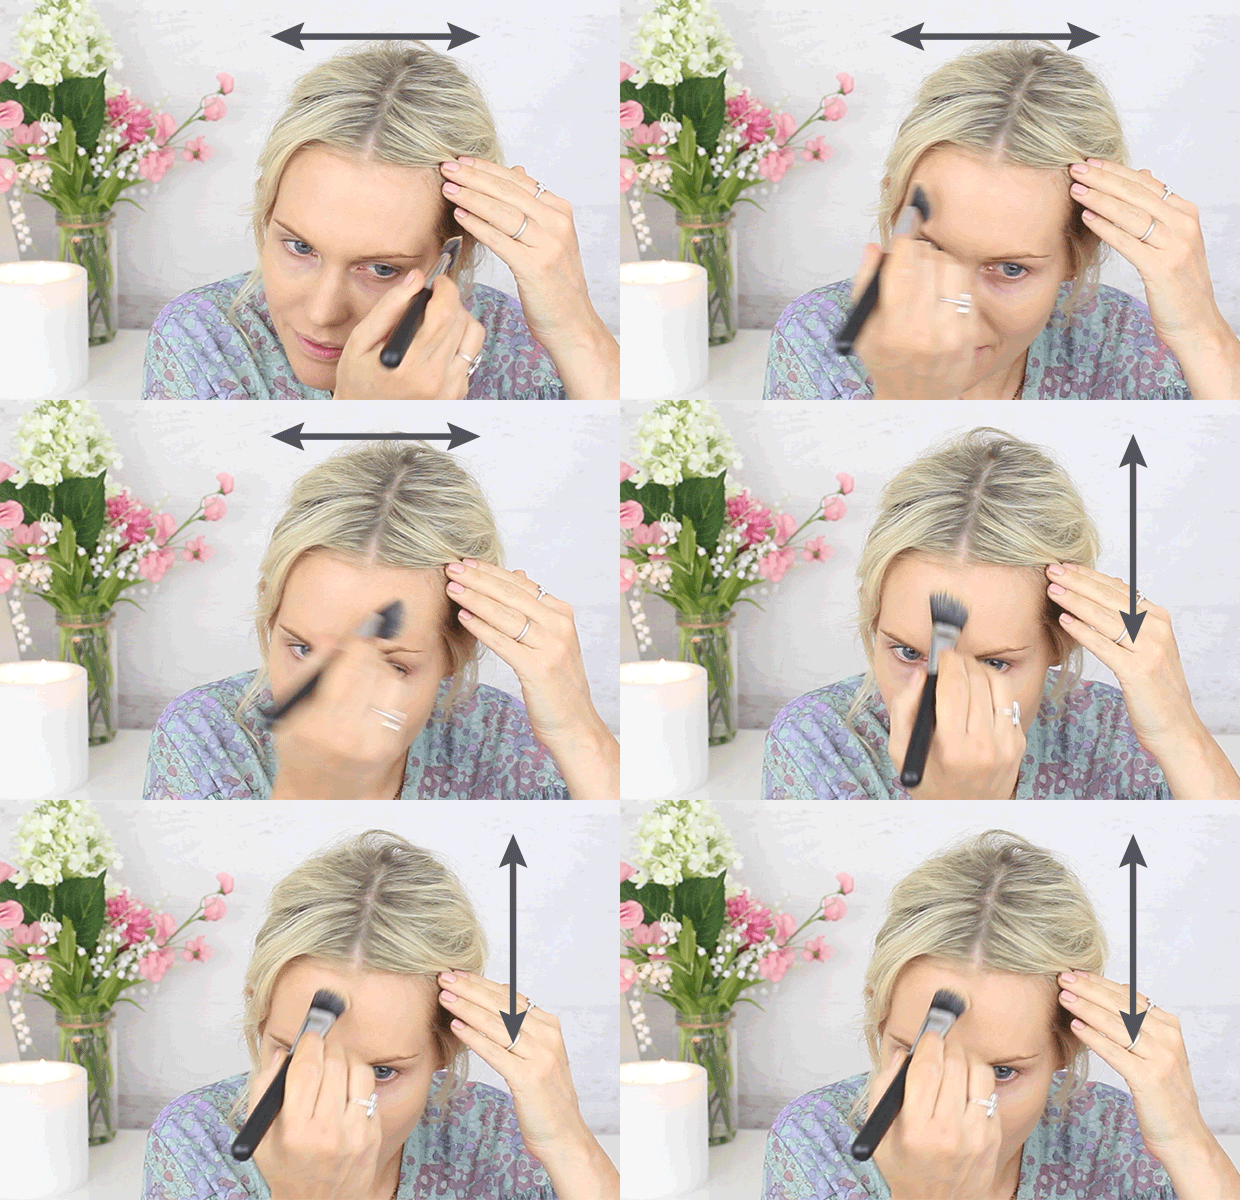
First, loading up the brush (use the back of your clean hand for liquid foundation, or for cream use directly), start by applying on your T-zone area – this area usually needs most coverage when eliminating redness and discolouration. Build the product gradually as this will make the look more natural AND it will last longer.Once you’ve applied the foundation to your T-zone, blend this out to the outer corners of your face. If needed, go in with another layer focusing on any areas that need a little more coverage (areas prone to redness are typically the chin, around the nose and cheeks if you suffer from Rosacea).
Remember to apply foundation under your eyes the foundation gives additional coverage to severe dark circles (before applying concealer if you need a little extra coverage). Apply a coat of foundation on your eyelids too (set in place with a light dusting of translucent powder). This will help any eye shadow stay on much, much longer!
TOP TIP: work the product in by applying the foundation in one direction and then using the brush in the opposite direction to blend out any lines or streaks. If you still have streaks with your foundation FEAR NOT – this is where your stippling brush will come in handy!
See how I work the foundation brush in one way and then the other…
Why I Love The Nanshy Foundation Brush
I love the Nanshy Foundation brush because, like a paintbrush, the bristles of this brush are soft but firm and densely packed, meaning that this brush will glide over the contours of your face.
It’s also perfectly angled to allow you to get into those tricky corners like around the nose or under the eye area. You can even use it as an eyeshadow base primer, covering your eyelids to even the tone and make your shadow last longer!


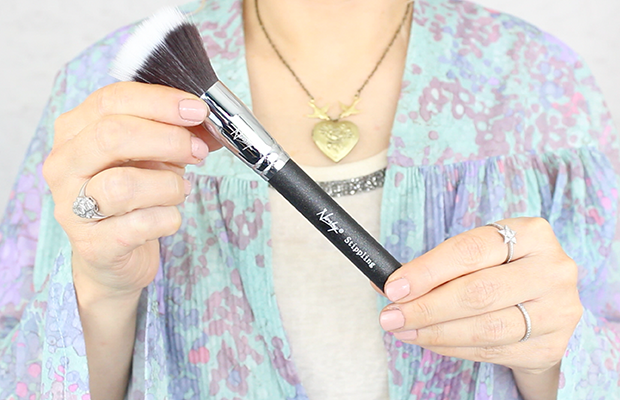
Why You Need a Stippling Brush
Stippling Brushes are designed to buff and blend foundation into the skin for that much sought after airbrushed effect!So if you’ve always wanted that flawless airbrushed finish that so many celebs are sporting, but didn’t know exactly how to achieve it – then this is the brush for YOU! This brush is where the MAGIC happens – trust me, you’ll never be without it again!
How to use a Stippling Brush like a pro
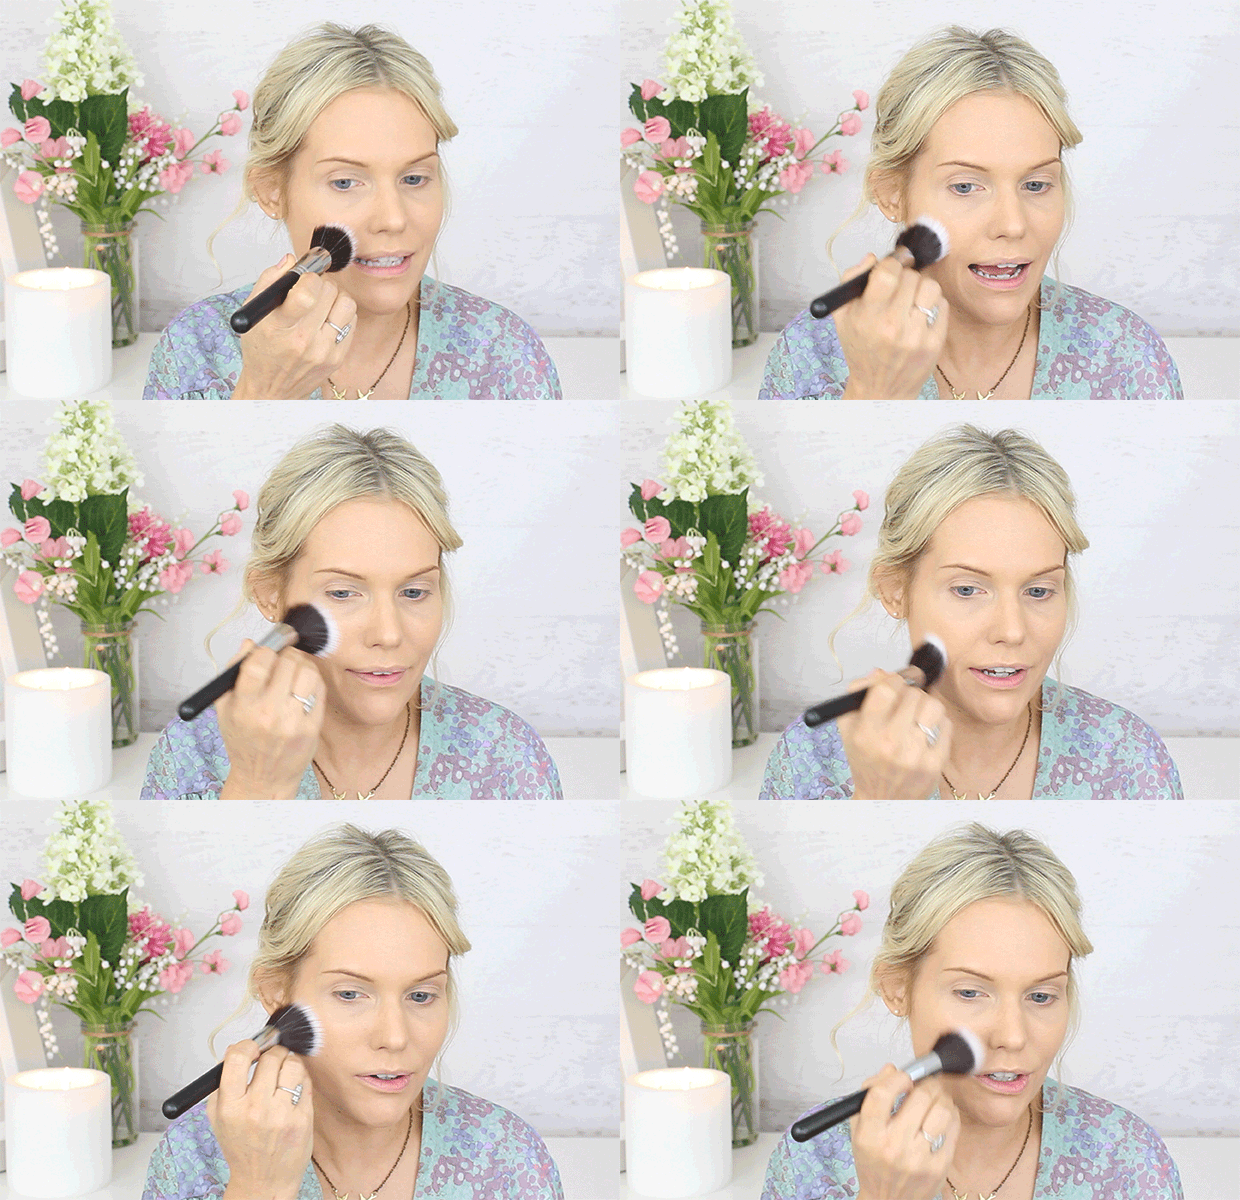
The stippling brush can be used to apply foundation in a similar way to the foundation brush, but can be used with liquid, cream or powder foundations. Just apply the foundation using the stippling brush in light circular motions all over the face – this will give a much sheerer/lighter coverage of foundation.
If you’ve already applied foundation with the foundation brush, just use this to buff and blend the foundation into the skin giving it that flawless airbrushed finish!
Why I Love The Nanshy Stippling Brush
The Nanshy stippling brush is a beautifully soft brush with denser bristles at the base and sparser, finer bristles at the top allowing you to achieve that airbrushed look.I just LOVE how by buffing your skin lightly, it covers up crevices, fine lines, pores and erases any streaks that might have formed if applied the foundation earlier. It will reveal a seamlessly flawless and most importantly, a NATURAL finished look!


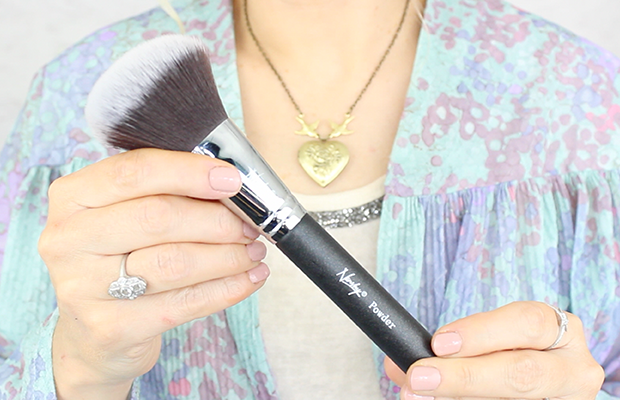
Why You Need a Powder Brush
A Powder Brush is such an important step in your makeup routine (especially if you suffer from any oily skin areas) because it helps set your makeup perfectly for the rest of the day!How to use a Powder Brush like a pro
Pick up the product with your Powder Brush, tap off any excess and buff around the face in circular motions. Use invisible blotting powder to sweep over the face in circular movements, concentrating on oily areas such as T-zone for combination skin or all over for oily skin. Dab and press on any areas that may need a little extra coverage!
The thing I absolutely LOVE about all these brushes from the Nanshy Masterful Collection is that they are multi-purpose, meaning you can pick and chose what brush you want to use for what purpose! The Powder Brush can also be used to apply your bronzer – just wipe clean on a towel after use to dust off any remaining powder, and apply your bronzer. Double tap the excess (important step!) and sweep along cheeks, temples, on the bridge of the nose and around the jawline and neck.
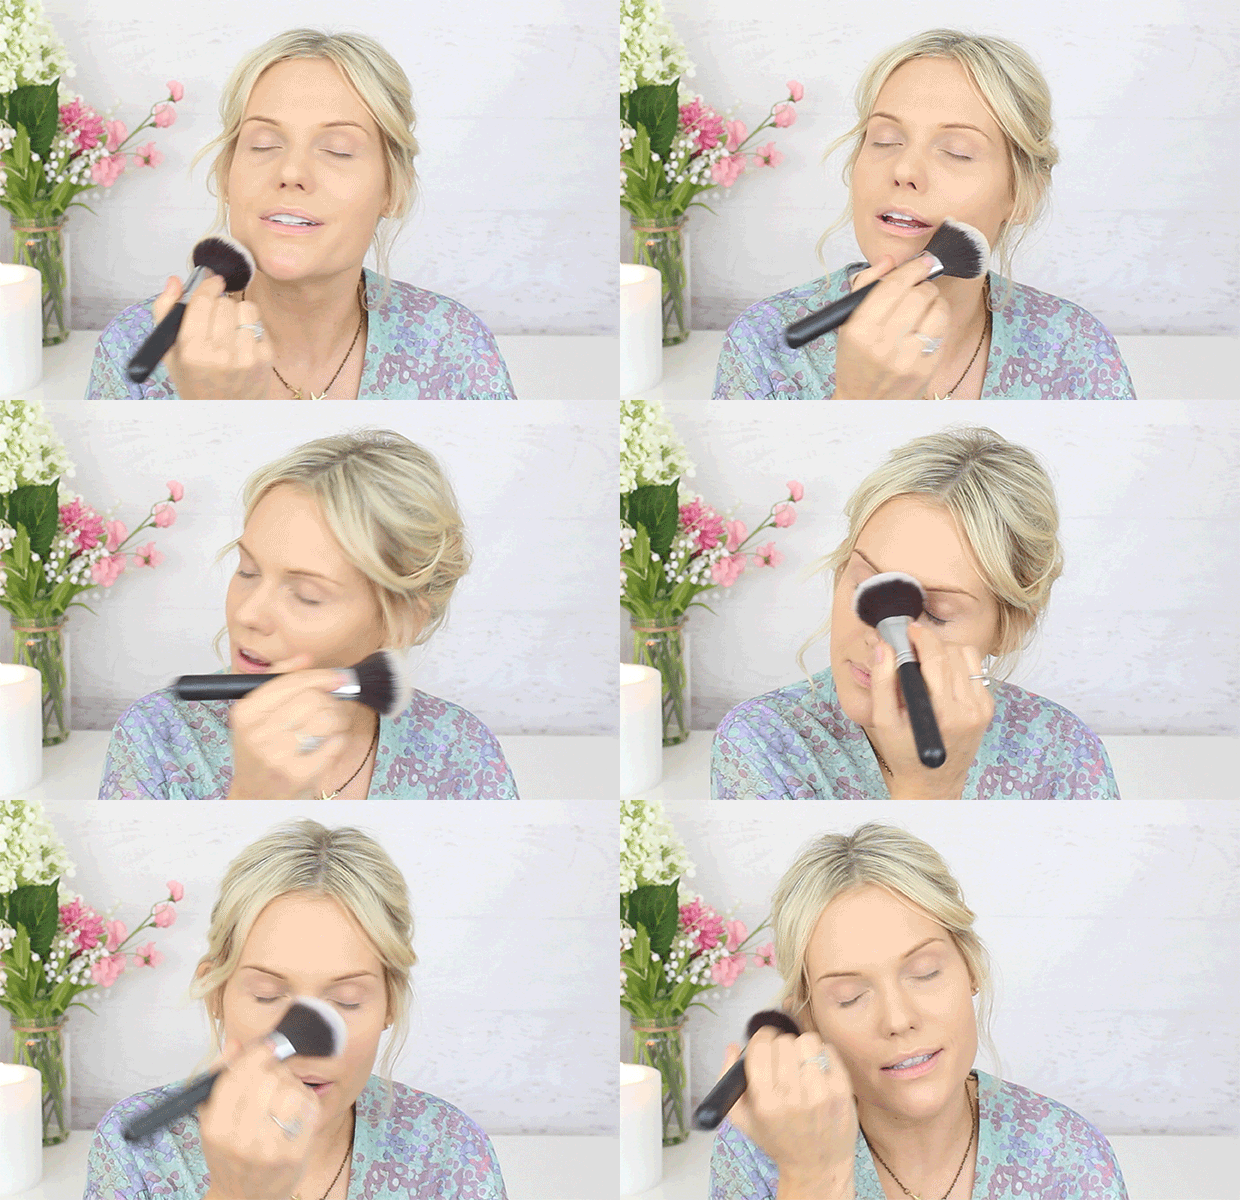
Why I Love The Nanshy Powder Brush
A good powder brush will pick up the perfect amount of powder needed, and the Nanshy Powder Brush does just this! You can also use it to apply powder bronzer, mineral or powder foundation.I love how this brush helps keep my face oil free ALL day – I even use it as a setting powder for my eye makeup, allowing the eye shadow colour to POP and to stay on for longer!


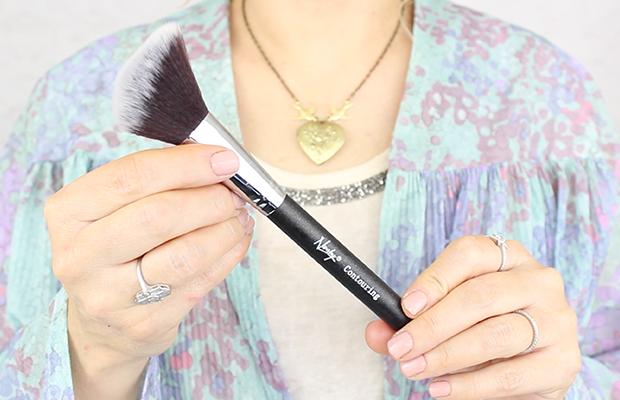
Why You Need a Contour Brush
Contouring can give your cheekbones an amazing lift AND will help sculpt and slim your face, making it appear more defined. For this, you need a great Contouring Brush!
How to use a Contour Brush like a pro
To use a Contour Brush, first load up the product on the brush, tap off the excess and pull a ‘fish-face’ (suck in your cheeks!).
Finding the hollow of your cheek (using the pointy side facing downwards to mouth) swoosh the brush upwards to the top of your ear. Hold the brush gently and build up gradually depending on how much contouring you like!
It’s great used for the jawline to define this area, and to make the nose appear slimmer, simply squeeze the brush together and go down the sides of your nose and under the tip.
Finding that ashy tone for your cheeks can be tricky – but the Daniel Sandler’s ‘Sculpt & Slim’ powder creates the perfect shadow and depth and used along with a contour brush really does make such a difference to your look!

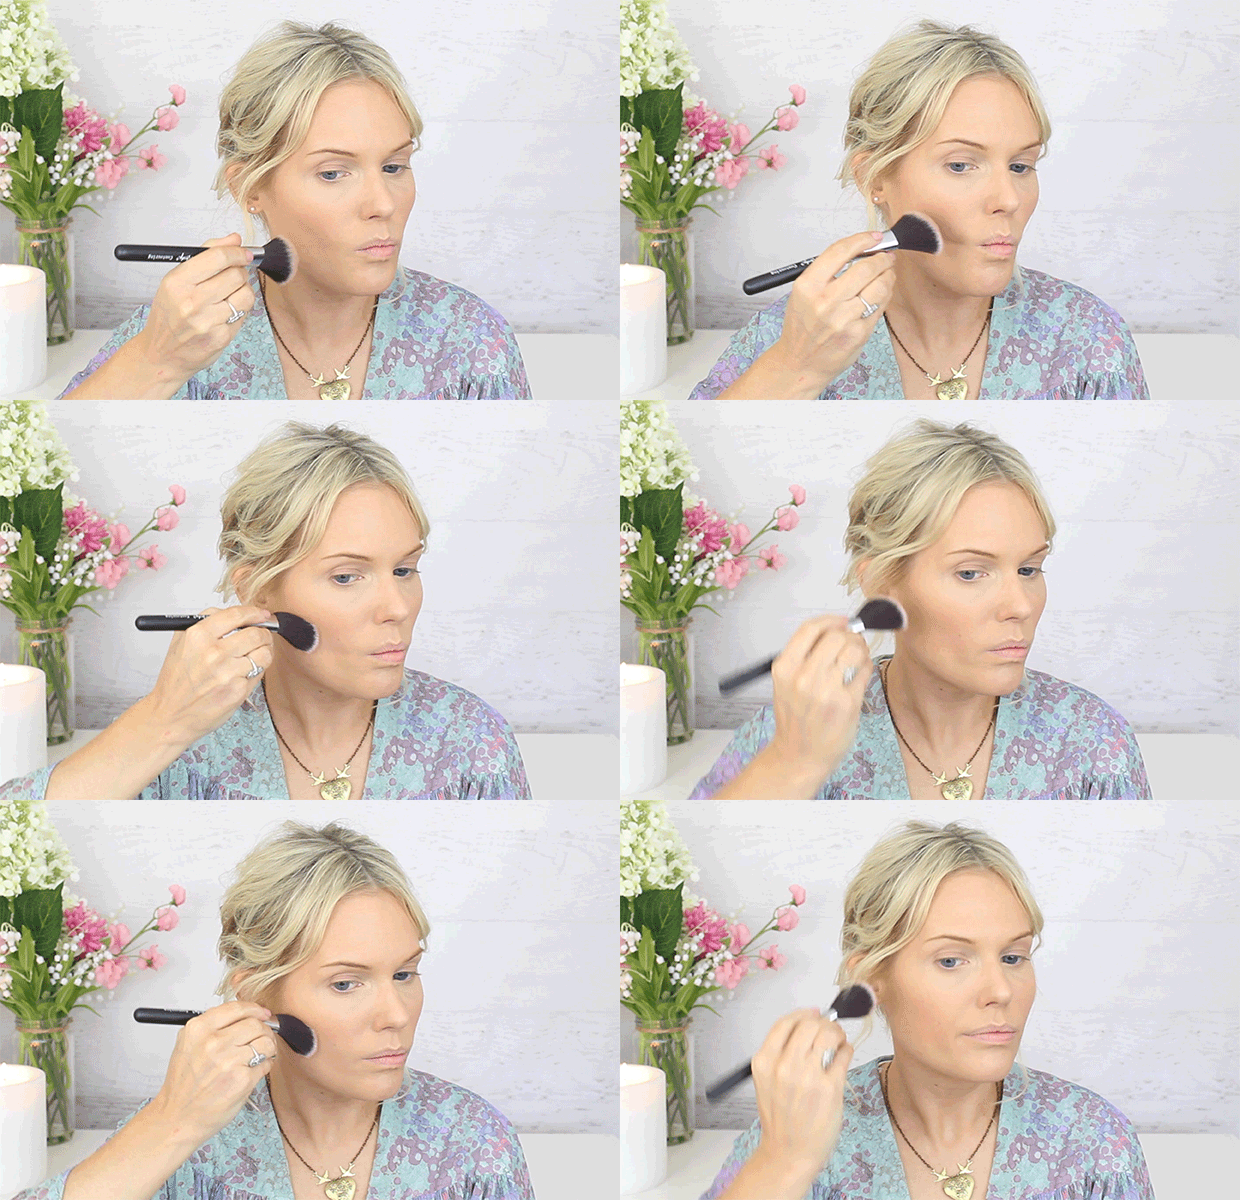
Why I Love The Nanshy Contour Brush
I contour my face EVERY single day! This has been the most requested look by my clients lately, and with The Nanshy Contour Brush you too can achieve a more defined, sculpted face like so many celebs today!
It’s brilliant because it’s perfectly formed to fit the contours of your face. Slanted and dense in the middle, it has a tapered end allowing it to blend evenly as it distributes the contour powder, creating the most natural looking effect!


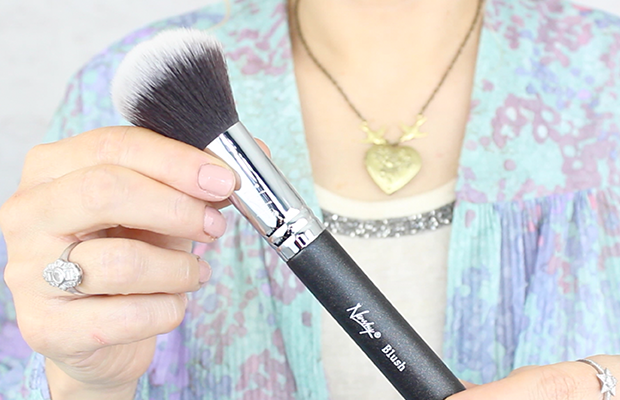
Why You Need a Blush Brush
For a naturally pretty looking colour to your cheeks, ALL you need is simply a Blush Brush! It’s the perfect finish to your face makeup.
How to use a Blush Brush like a pro
To use a Blush Brush (this works for powder blush, but for cream or liquid blush you can just use our fingers), I simply load the brush with a little product, double tap (this will become second nature soon – PROMISE!) the excess as you don’t want to end up with too much colour!
Looking in the mirror, smile and sweep upwards from the apple of the cheek, just down from the pupil holding the brush very lightly (a lighter touch means you have more control of the amount of product used, if holding heavier then the colour will be thicker).
Just use swooshing motions upwards and then swirling circling motions on the apples of your cheeks.
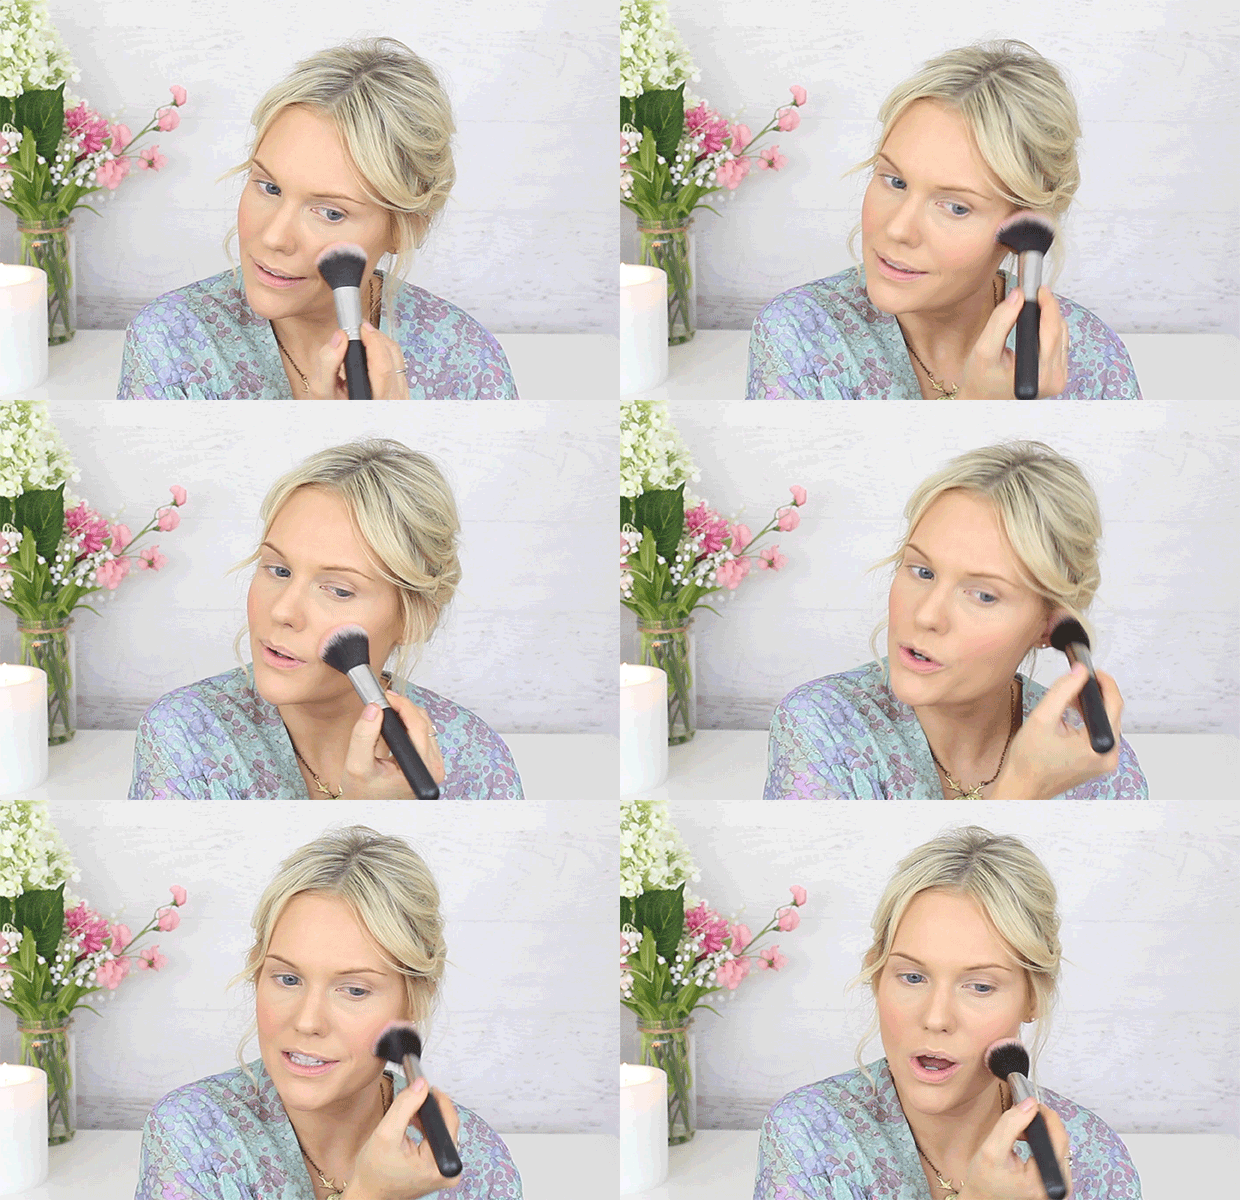

Why I Love The Nanshy Blush Brush
I just ALWAYS feel happier when I wear blush – it lifts our complexion, making us look more youthful and fresh-faced! And what’s not to LOVE about that?
The reason I love this brush so much is that it’s perfectly dome-shaped to fit the apples and high points of your cheeks, and so makes applying blush that much easier! Why make things complicated?


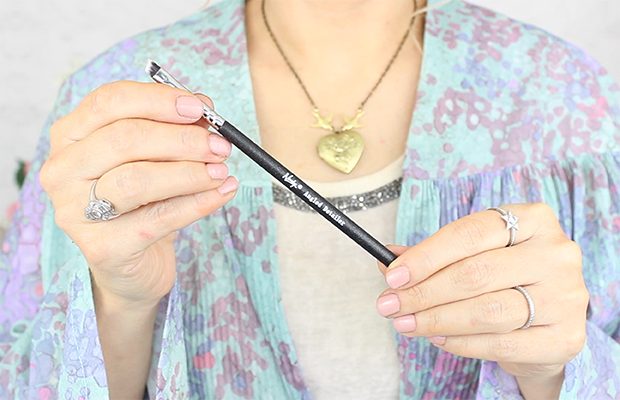
Why You Need an Angled Detailer Brush
An Angled Detailer Brush is such a great little multi-purpose brush, it will soon become your favourite little brush!If you’ve always dreamt of thicker and fuller looking eyebrows OR perfectly defined cat eyes (using liquid or gel eyeliner) – then this is the brush for YOU!
How to use an Angled Detailer Brush like a pro
Simply dab the brush with product, tap off the excess (the usual procedure!) and start filling in the missing hairs with light, feathery strokes.
Starting at the base of the brows, you’ll soon notice that the eyebrow will start to take form. Try not to make the start of the brows too thick, as this is a tell tale sign you’ve filled your brows in – we want them to look NATURAL, not painted on! Natural brows but at their very BEST.
To highlight your brow bone even more, just clean the brush first, then using some concealer two shades lighter than your natural skin tone, dab under the brow from the arch to the end point. Use your fingers to blend and create a more lifted and defined shape!
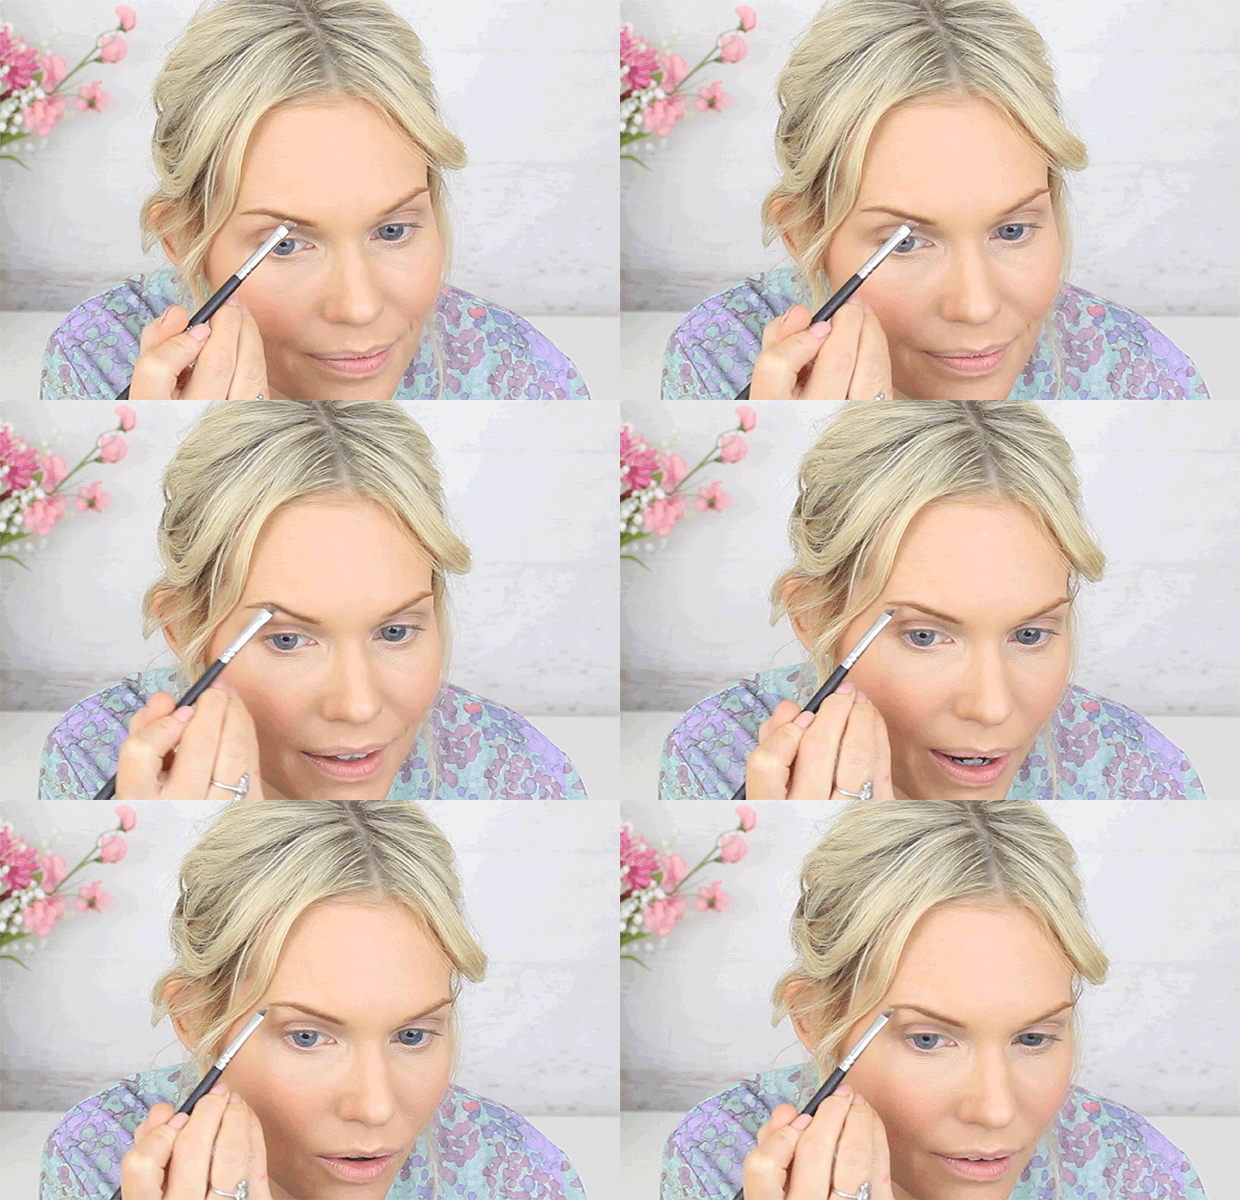
Why I Love The Nanshy Angled Detailer Brush
Because the Nanshy Angled Detailer Brush is so tapered and thin at the end, it means you will get a VERY precise shape, making filling in sparse eyebrows especially simple!
It mimics the hair strands that are missing, and with light, feathered strokes it’ll look like they’re your very own gorgeous brows!
And for that defined winged eyeliner, you’ll need a brush like this to create the perfectly defined flick! A classic look that will never date – and that has never been easier to achieve!


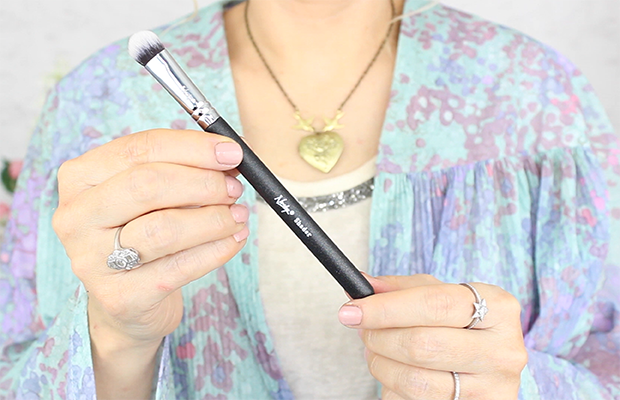
Why You Need a Shader Brush
A Shader Brush is the perfect base brush to apply eye shadow to the lids because of it’s very densely packed bristles and dome shape. Shader brushes fit snugly over your lids making applying shadow a doddle – for EVERYONE!How to use a Shader Brush like a pro
Add the product to the brush (tapping off the excess as usual) and with a neutral colour first, pat over your eyelid for the best coverage. Make sure not to swipe the colour, instead pat the colour on – this will make the colour truer to it’s original shade as well as having longer staying power!
For a perfect base colour, look no further than the lighter side of the Daniel Sandler’s ‘Sculpt & Slim Powder’ – multi-purpose products come in handy as they save space in your handbag AND your wallet! And you can use the darker side for your crease – more on this below!

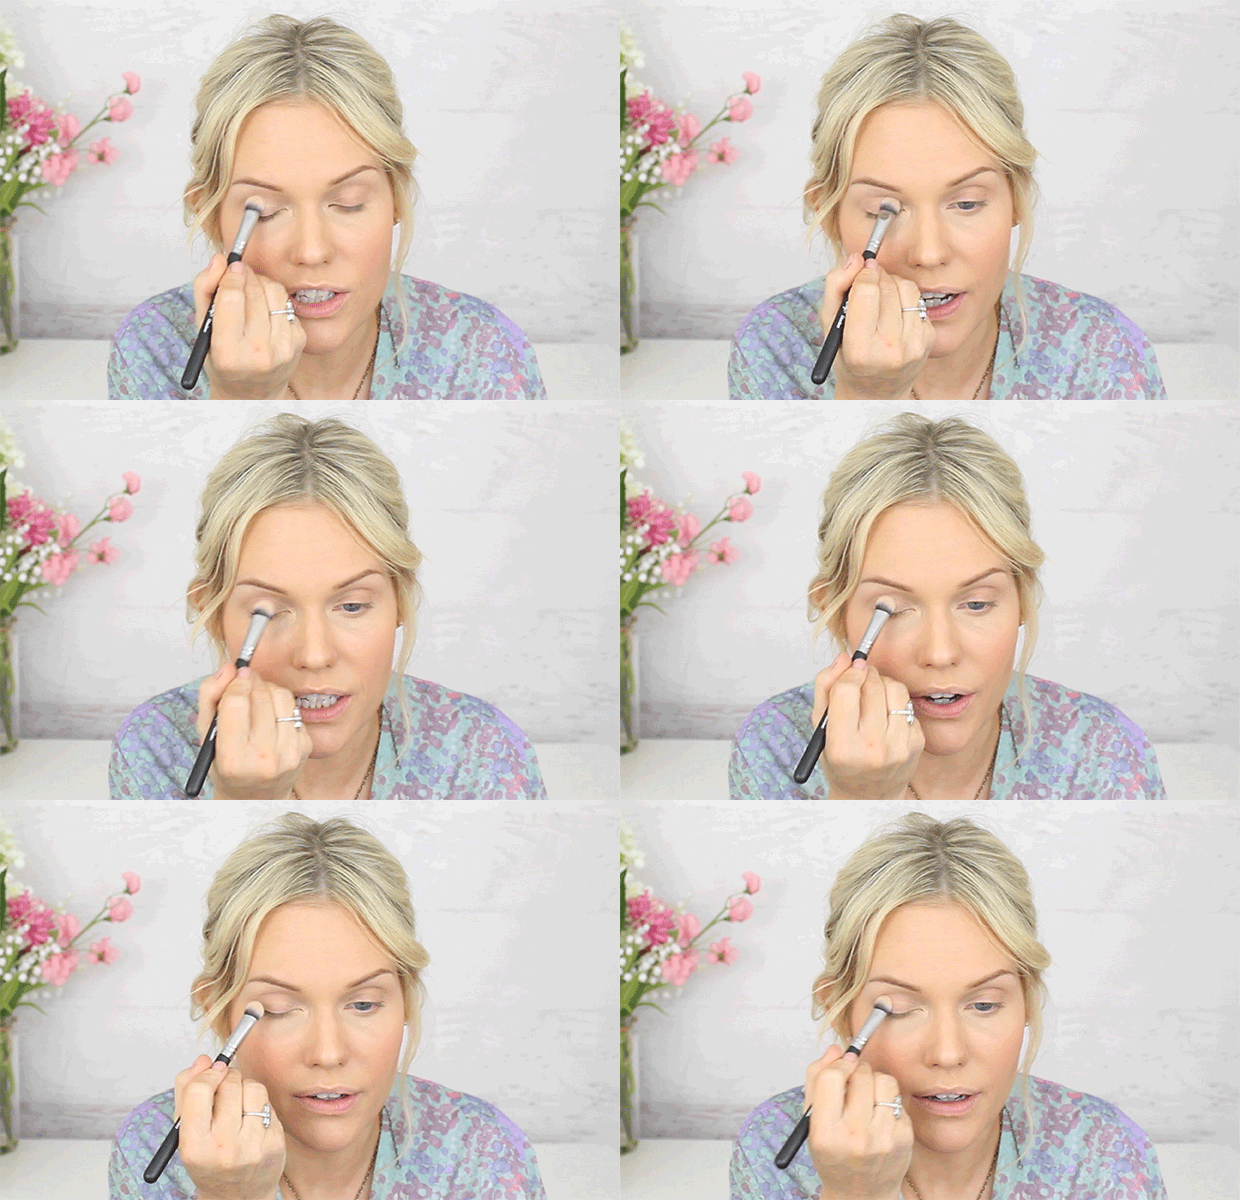
Why I Love The Nanshy Shader Brush
The best thing about the Nanshy Shader Brush is that it fits perfectly over the eye, making it quick
erand easy to apply colour.The colour of your eye makeup will stand out more when you have a densely packed brush like this, and it will take less product to create the desired effect! So if you’re after maximum impact with minimum effort, look NO further!


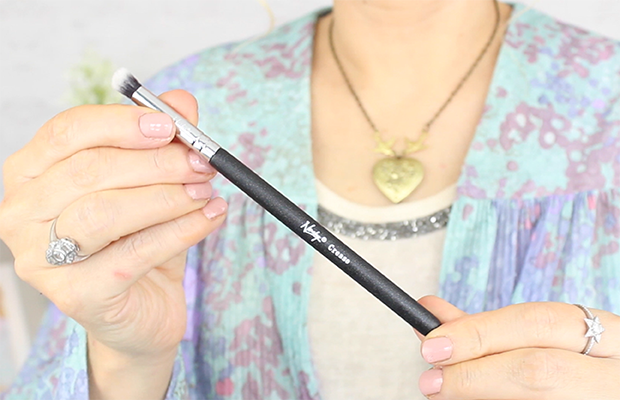

Why You Need a Crease Brush
To get an instant eye lift this is the brush to have! A Crease Brush is a great little makeup tool to have in your kit because
ofthe compact bristles makes applying colour to the crease so easy and SOFT.How to use a Crease Brush like a pro
Simply use the Crease Brush to load some product (tapping off the excess) and using your pinky finger, stabilise the brush and place it in the middle of your crease. Go back and forth, creating a diffused and blended shadow AND an instant eye lift!
If you’re looking for that perfect shade for the crease of the eye, then Daniel Sandler’s ‘Sculpt and Slim’ powder really fits the bill as the darker shade is a neutral dark tone, but you can use ANY shade that’s about two tones darker than your natural colour.

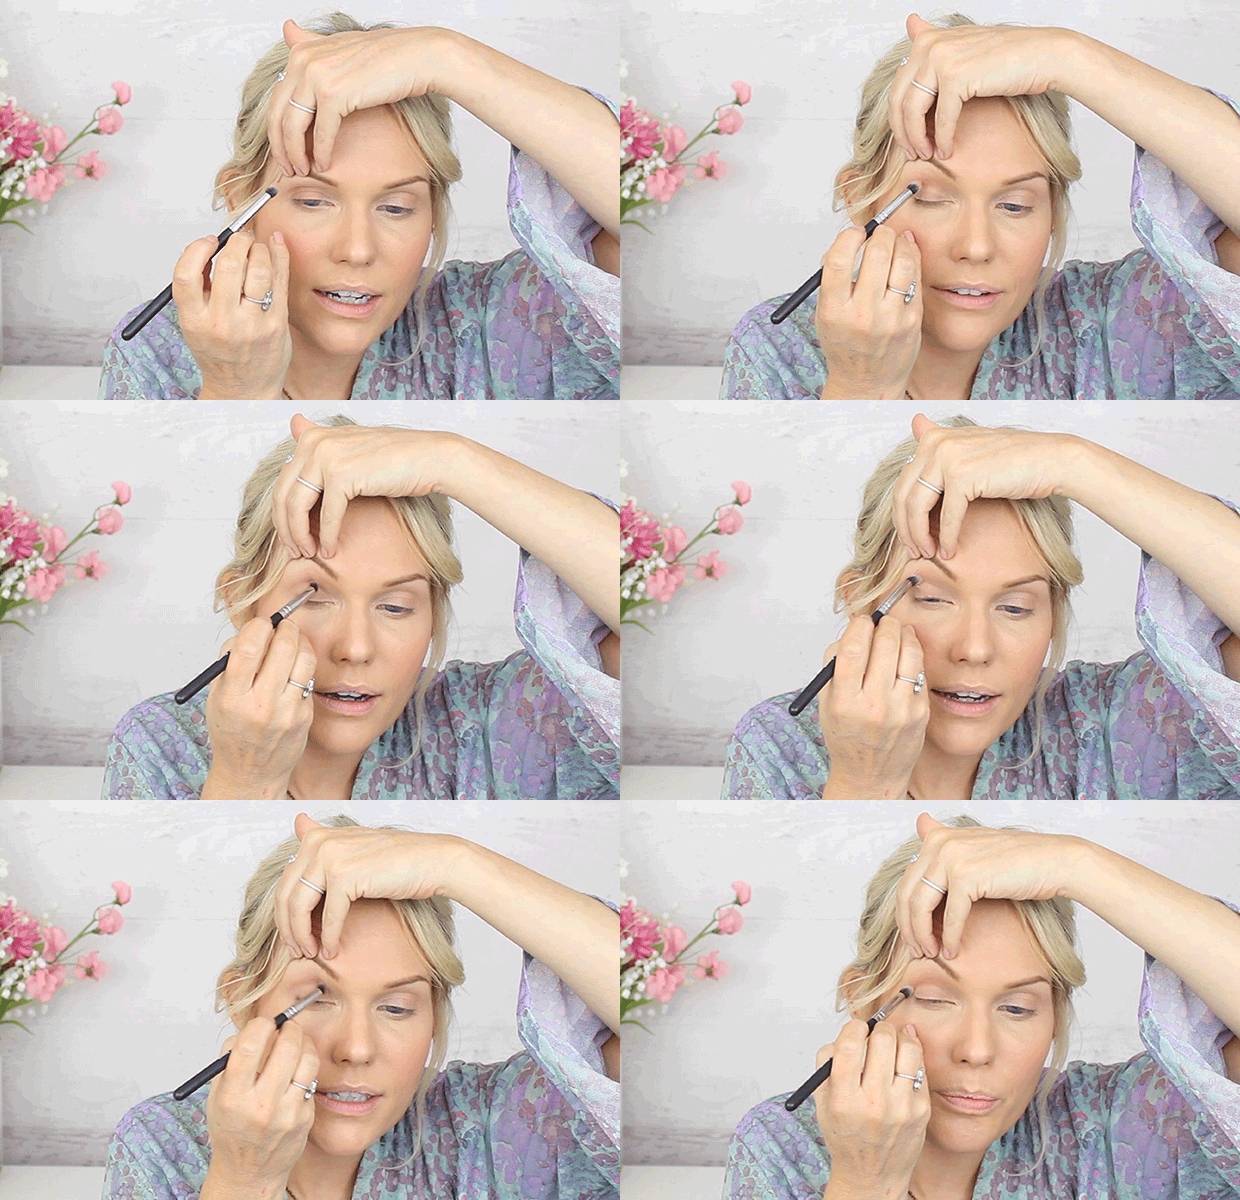
Why I Love The Nanshy Crease Brush
Because of the shape of the Nanshy Crease Brush, it totally makes applying shadow to the crease so easy and blendable, creating a much more natural look.
I love using it to blend my concealer under the eye, creating a diffused and airbrushed look (just make sure your brush is clean!)
Also, if you have hooded eyes it’s the perfect brush because it actually lifts the hood and gets into the crease to define it better.

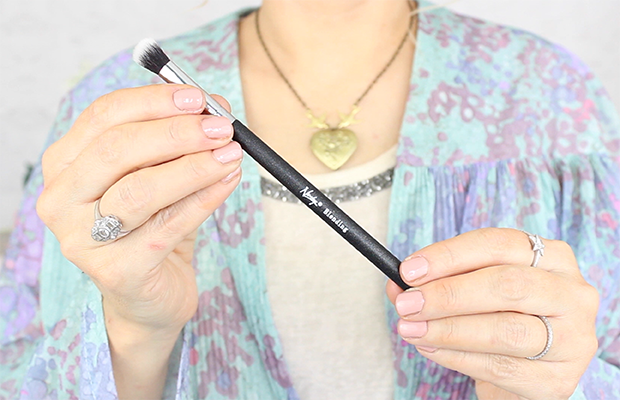
Why You Need a Blending Brush
A Blending Brush is basically the brush that makes your makeup look more polished AND professional as it creates that seamless, natural finish.
This brush will soon become your go-to brush for creating a natural and professional look!
How to use a Blending Brush like a pro
First, making sure your brush is clean, use back and forth circular motions to soften any edges that you created with your crease brush. You want to BLEND the edges gently and softly.
Making
sure not to blend everything into one (unless you want an all over colour) otherwise you loose the definition you created earlier. Basically, you just want the eye shadow to look as seamless and natural as possible. That may take a little practice but once you’ve got it, it’ll soon prove to be the BEST brush in your makeup kitYou may have always thought achieving that seamless eye makeup look was unattainable or for professionals only – but with this brush ANYONE can accomplish this look! Just a bit of blending required!
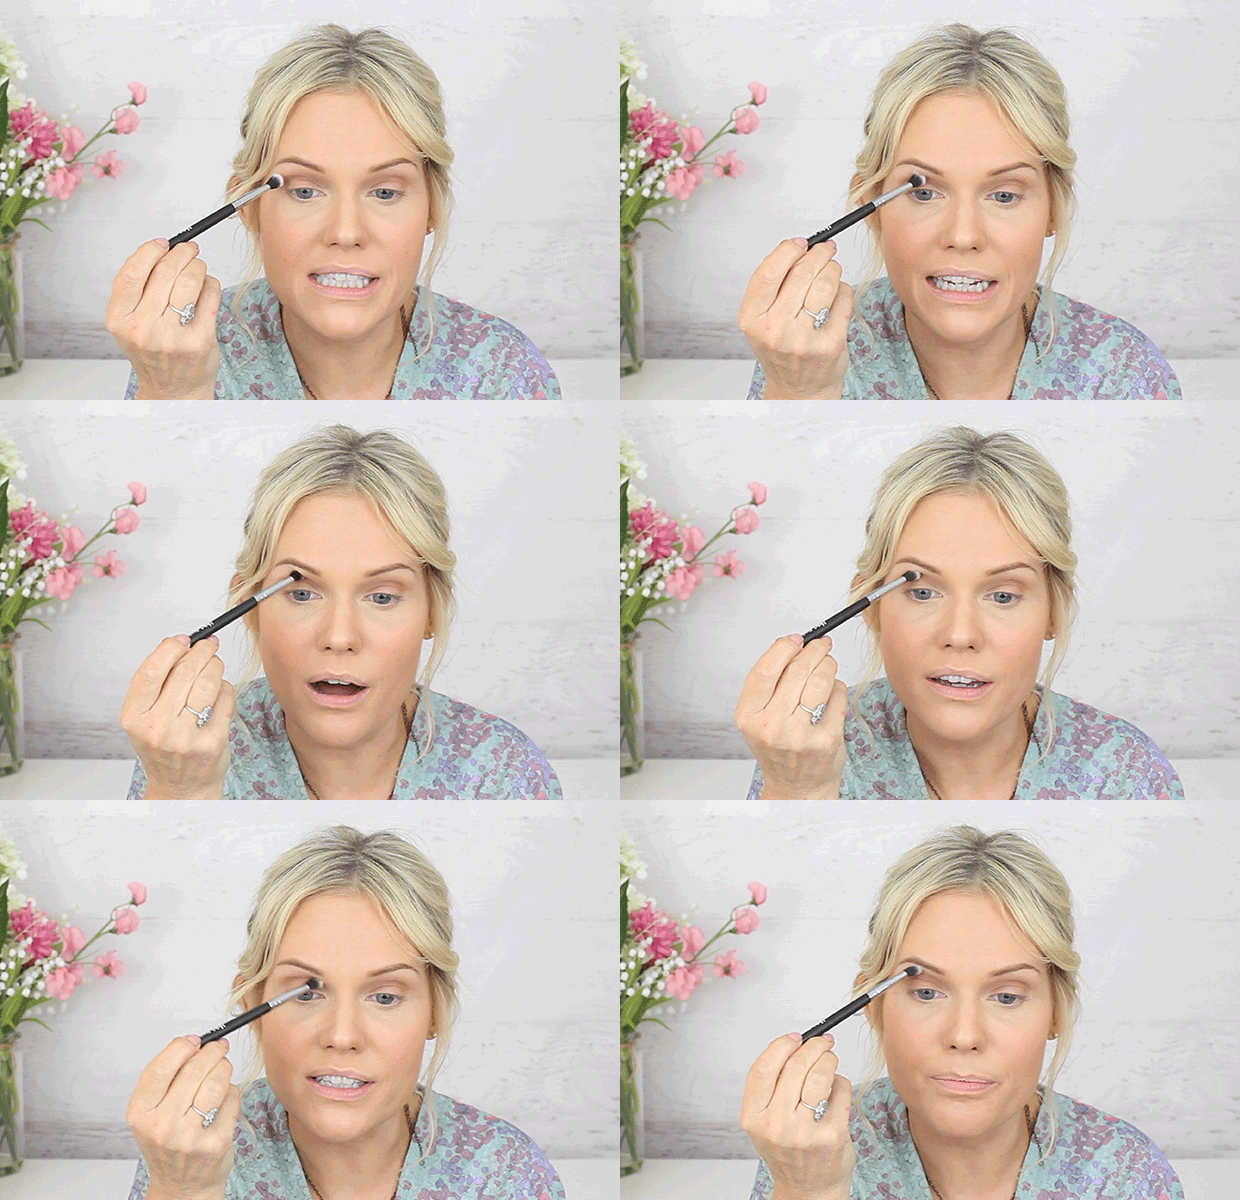
Why I Love The Nanshy Blending Brush
The Nanshy Blending Brush really does blend and diffuse eye shadows to perfection! I love how fluffy the brush is, making it baby soft to your delicate eye area.
It’s also easier to rectify any mistakes just by buffing the edges – AND is the best tool to create that sexy smokey eye makeup look! It will SUPER charge your eye shadow!!

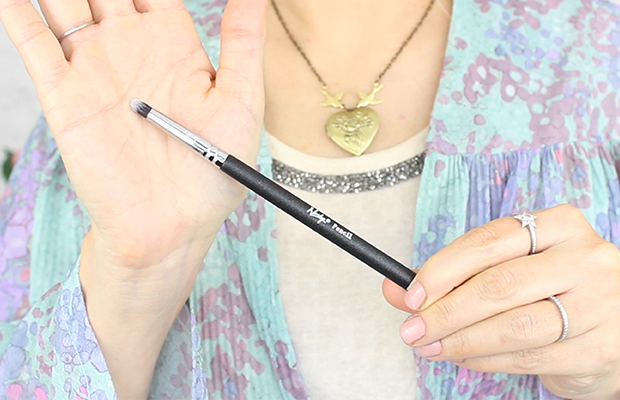
Why You Need a Pencil Brush
A Pencil Brush adds great definition and depth to your eyes and can be used in many ways, whether you’re used to lining your eyes or not!
The pencil brush will transform eyes to make them really STAND out – great if you’ve always wanted that sexy, smouldering look then this is the brush you need!
How to use a Pencil Brush like a pro
Apply your eyeliner first along the lash line – don’t worry about it being perfectly straight! Use your brush to smudge the edges creating a softer, more youthful look. Erasing ALL harsh lines, this keeps the depth by simply sweeping up to the edge of the eye.
Then dab the brush into some darker shadow, pat and dab this colour along the lash line, sweeping upwards at the outter corner towards the end of your eyebrow. You can use this both on the upper lash and lower lash line to create a more open and pretty look!
For rounder softer eyes, just dab some product on the brush and tap off the excess. Look up, and taper the colour under the eyes near the lash line from the outer to middle of pupil (you can go the whole way if you prefer).
For creating that sexy smokey eye look, Daniel Sandler’s ‘Eyeliner and Eye Shadow Duo’ will be the perfect companion with this brush – your eyes have never looked better!!
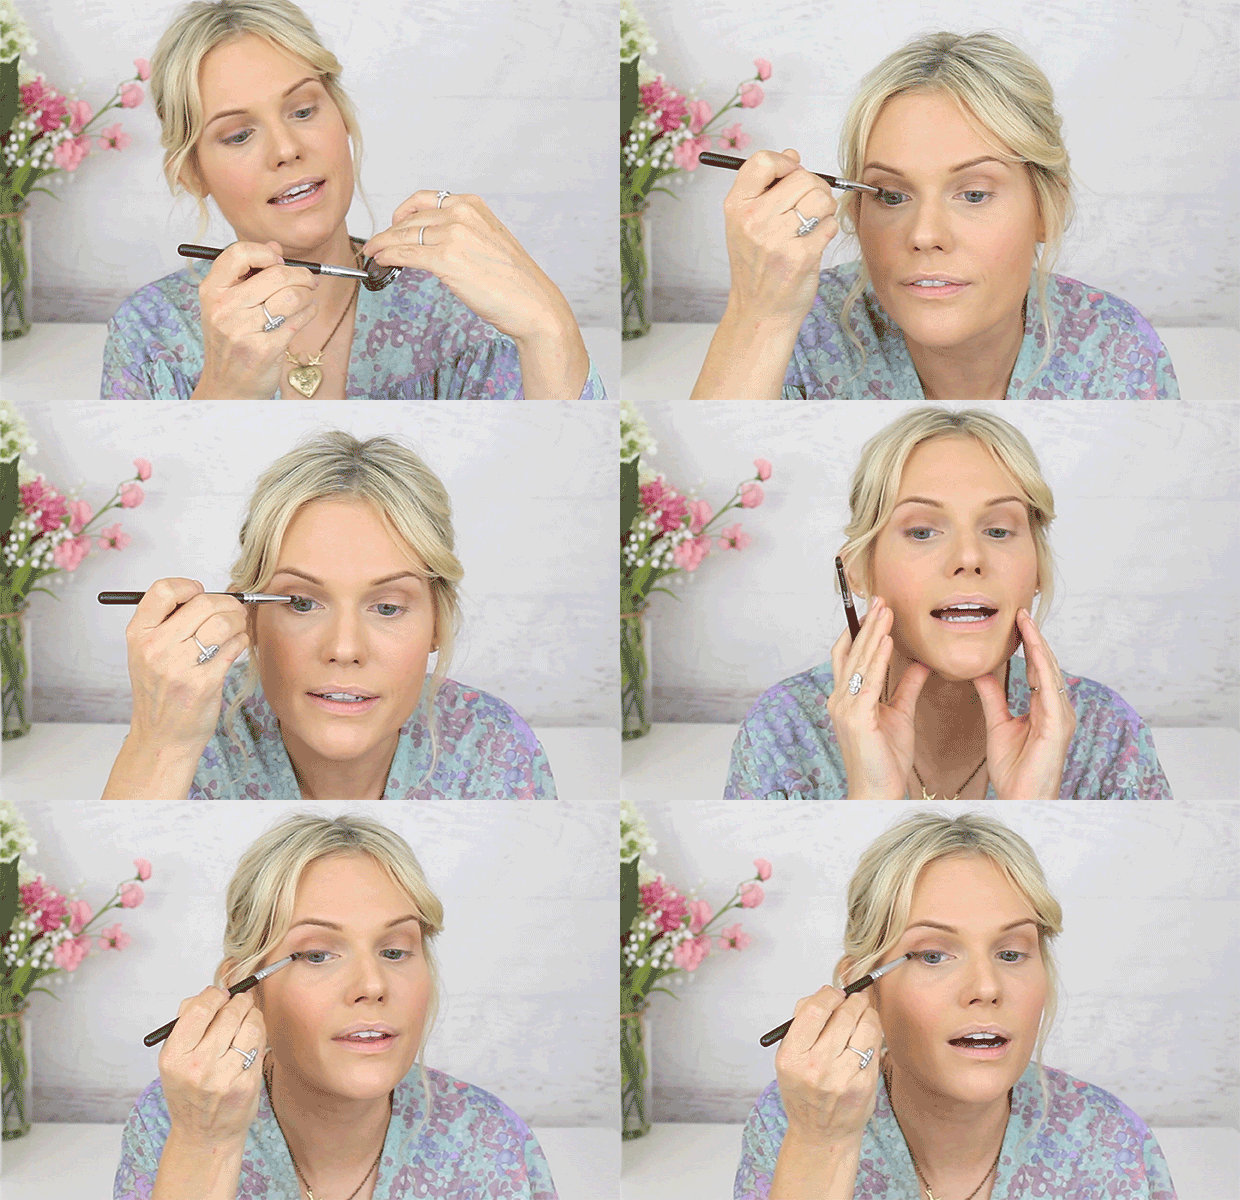
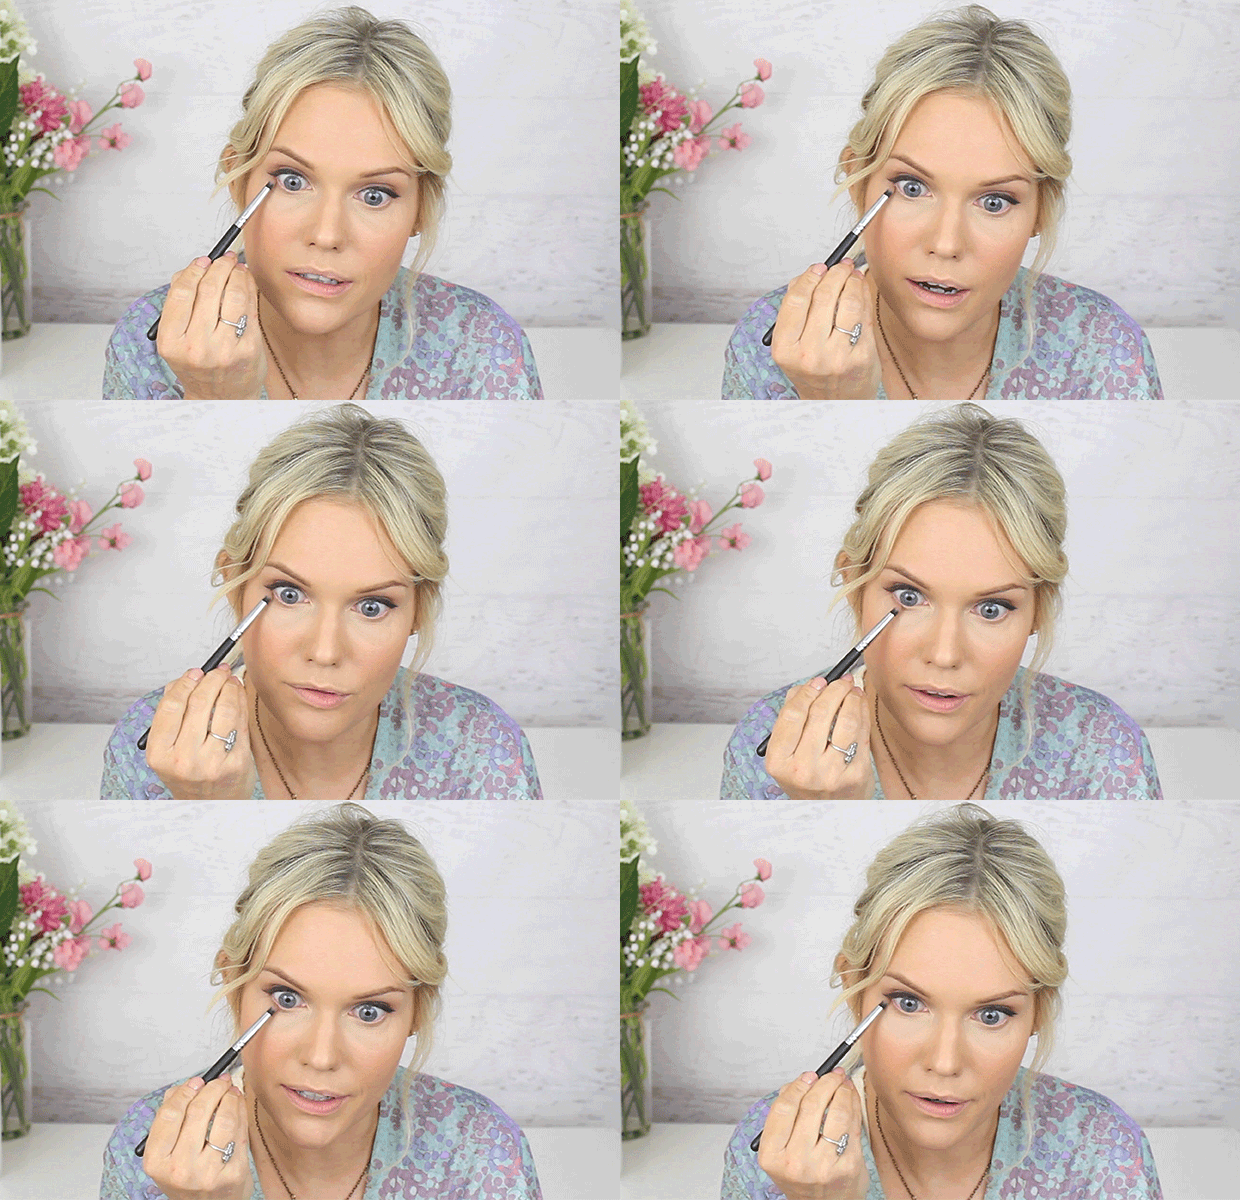
Why I Love The Nanshy Pencil Brush
I love how this dual purpose Nanshy Pencil Brush is the perfect tool to elongate your eyes OR make them rounder, whichever look you prefer!
PLUS, it makes applying eyeliner so much easier! You can use it to soften the look of harsh eyeliners, or strengthen the eyes by adding a darker shadow to the lash line.

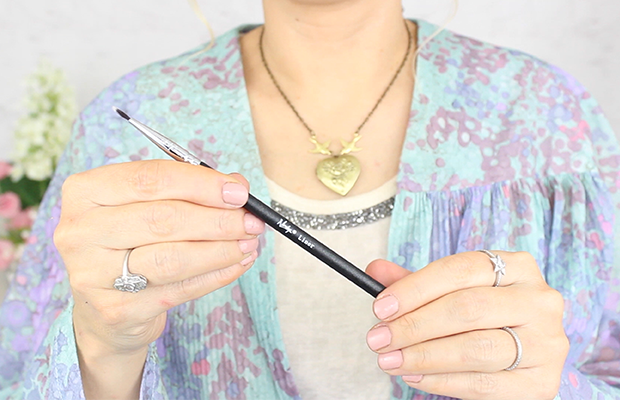
Why You Need a Liner Brush
The Liner Brush is like a long artist brush that easily achieves a flawless look for liquid or gel eyeliner in just a few simple strokes.
It will give you a glamorously defined eye, that’s the stuff CLASSICS are made of! This look never fades throughout the decades and this brush will help you achieve it!

How to use a Liner Brush like a pro
Dip your brush into your gel / liquid eyeliner and wipe off any excess into a tissue – you don’t want too much product otherwise it will clog up!
Using your little finger to stabilise your hand, start at the middle of the eyelid and pull to the outer corner. Go to the inner corner of the eye, drawing a line to match up with the other one.
Add more liquid / gel and, tilting your head backwards, put the outer swoosh on the corner of the eye (you can stretch the skin of the eyelids if that helps!). Any mistakes – just wipe off with a cotton bud! You’ll soon be ROCKING that glamorous old school Hollywood look of starlets!
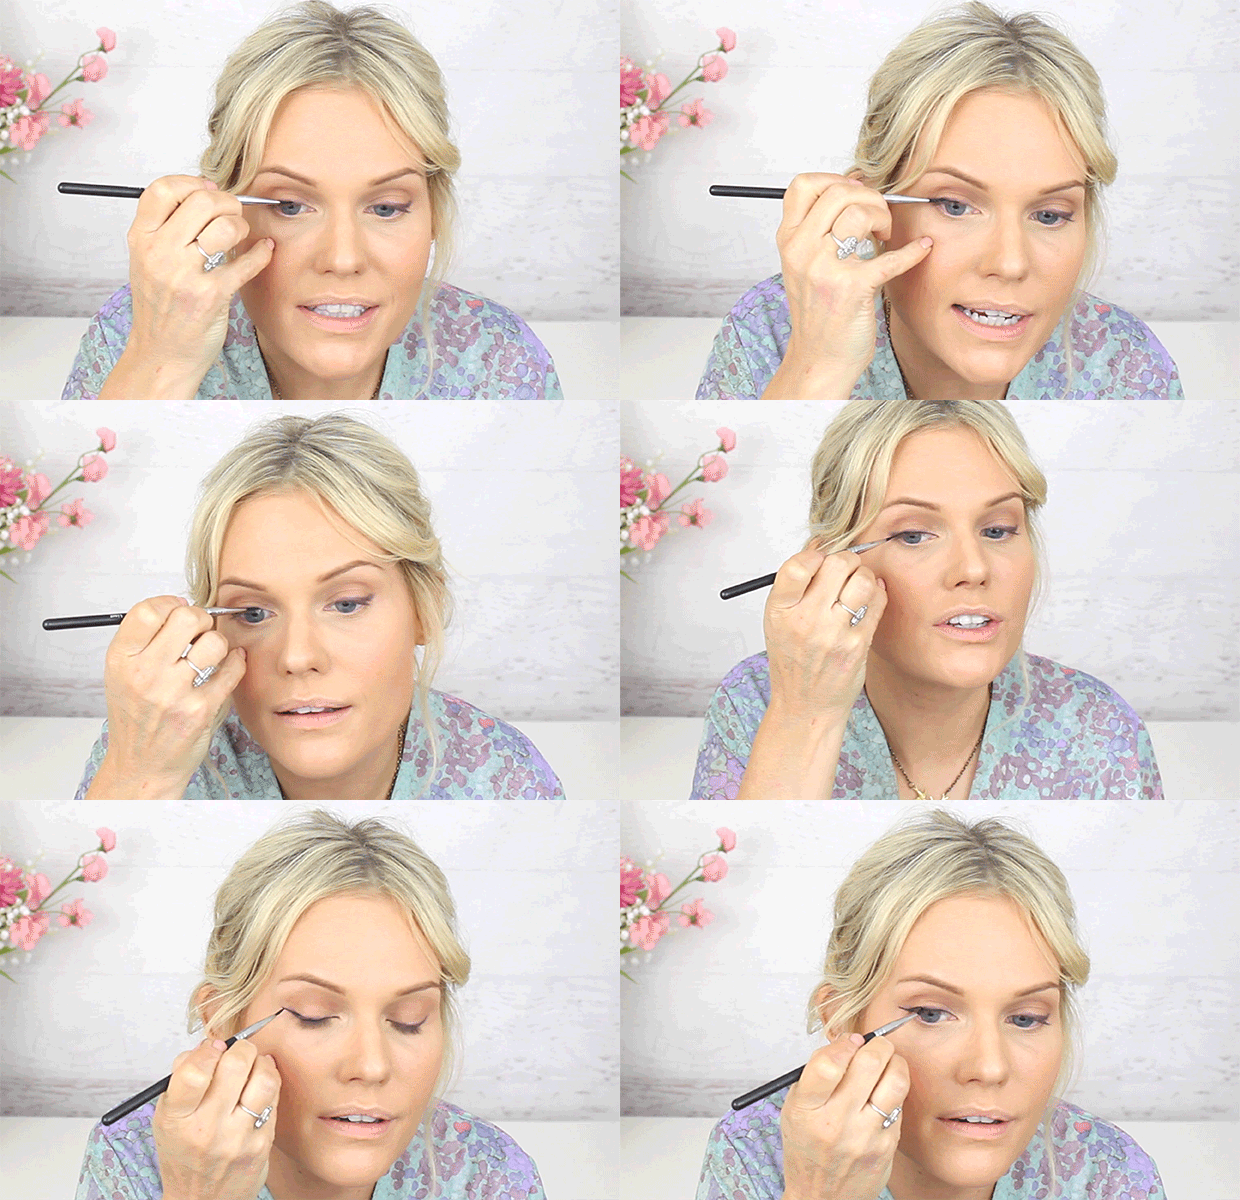
Why I Love The Nanshy Liner Brush
The reason I LOVE this Nanshy Liner Brush so much is because it’s similar to my old favourite brush I used to create the winged eyeliner look – which happens to be an artist paintbrush!
The tip is thin and long and precisely what is needed to create the perfectly defined cat eyes. This brush takes your eyes to another level and really sets off your whole look!

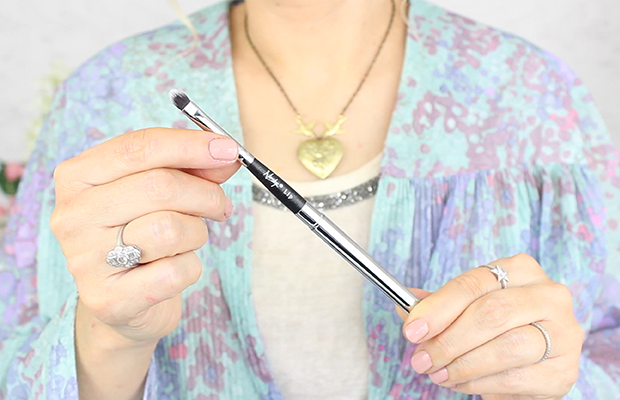
Why You Need a Lip Brush
Owning a Lip Brush is the perfect finishing touch to your makeup! It will expertly define your lip shape and transforms how your lipstick sits on your lips ALL day long!
PLUS, it makes your lipsticks last a LOT longer!
How to use a Lip Brush like a pro
Start by loading up the product on your brush on both sides. Then place the brush in the middle of your lips, moving it back and forth (use your pinky finger to stabilise if needed).
To define your shape, just use the sides of the brush, and use the flat side for the fleshy part of your lips!
If you’ve never worn a red lipstick before and have always wanted to find YOUR perfect red, I’ve chosen the perfect palette for you! It allows YOU to create your very own custom signature shade. This palette is called the 3 Custom Colour ‘A Century in Red Palette’ and gives the perfect POP of colour!
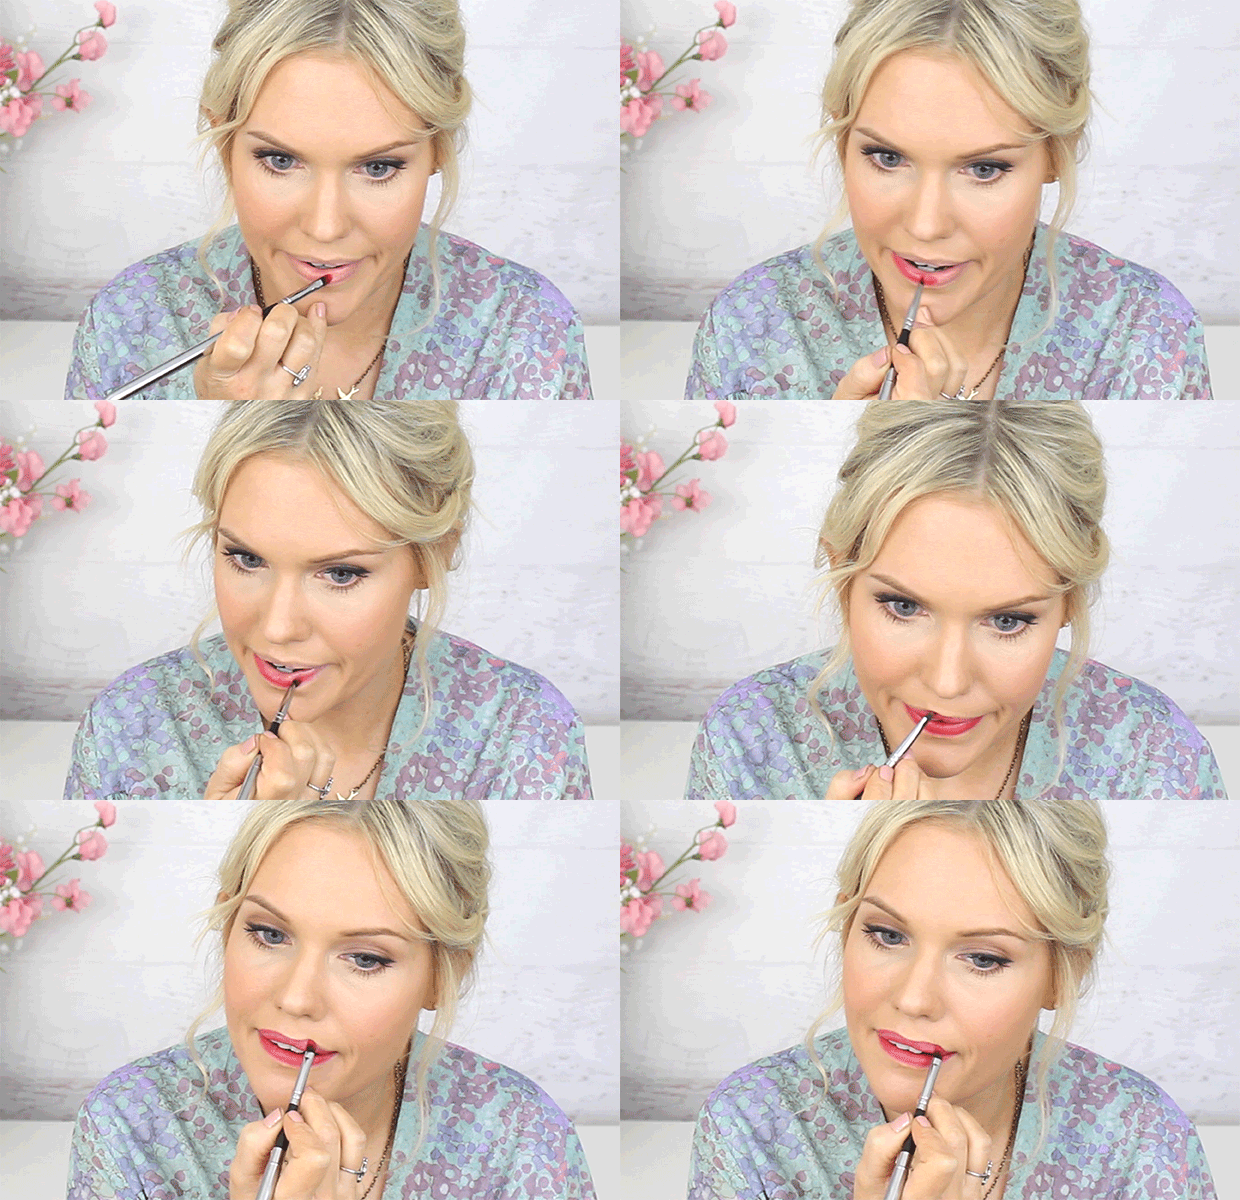
Why I Love The Nanshy Lip Brush
If you’ve never used a lip brush before, you won’t believe the difference it makes! This Nanshy Lip Brush is brilliant because it really makes applying lipstick super easy – your lipstick will not only last longer, but it will sit better on your lips, wearing off more naturally.
And the BEST part? Because you apply it directly from the lipstick bullet, it will take much longer to run out of that favourite lipstick of yours! RESULT!!!


The thing I absolutely LOVE about all these brushes from the Nanshy Masterful Collection is that they are multi-purpose, meaning you can pick and chose what brush you want to use for what purpose! Plus, they will help you create professional flawless, natural looking makeup, like you but only a really great day!
I think you’ll LOVE these Nanshy Masterful collection brushes just as much as I do!
And they’ll change the way your makeup looks (and feels) for good…no other reason is needed!
Love,

Makeup Artist | Stylist | Founder of Beautyandtheboutique.com
